This leather color repair kit has been designed as a DIY professional leather colorant repair kit where you get a base color similar to your leather finish and then mix several tints to the base color to match the color of your leather perfectly, allowing repairs to become invisible.
Our Water-based and NMP-free self-sealing leather repair paint is best for pigmented leather and can be both sprayed and sponged for the best results.
- Solvent-Free So Safe To Use
- Extremely Flexible
- Self Levelling
- Self Sealing
- High Scratch Resistance
- Luxury Feel When Cured
Works on:
Car Leather Interiors, Leather Sofas, Leather Chairs, Leather Shoes, Leather Handbags, Leather Briefcases, Leather Saddles, Equine Leather, Leather Jackets, Motorcycle Leathers, Leather Boots, Leather Purses, Leather Trousers. Leather Clothing, Motor Bike Leathers, Leather Walls, Leather Tables, Leather Watch Straps.
Types Of Leathers:
Pigmented Leather, Corrected Grain Leather, Semi-Aniline Leather, Two-Tone Leather, Antique Finished Leather, Top Coated Leather, Vegan Leather, Bi-Cast Leather, Bonded Leather, Faux Leather, Vinyl.
Not suitable for use on suede, nubuck, or aniline leather finishes.
Instructions
Our Kits are unique they are a very easy, simple three-stage process.
1/ The first step is to use the prep, which is designed to remove some of the old surface coatings, the reason for doing this is it's removing all old dirt, grease, waxes and oils from the surface and some of the old manufacturers finish, this then gives you a base to work from allowing the colorant to adhere correctly to the leather's surface. Without removing some of the color, the new color won’t bond correctly. You don't have to remove all the color just enough to break the surface. ( if you have holes and bad scuffing this needs fixing at this stage before you proceed to step 2)
2/ The next stage is to color the area to be repaired. This can be either sponged on or sprayed on using a spray gun.
3/ Once colored, you then seal this over with the clear coat leather sealers (Gloss and Matt Finish) the gloss and matt finish can be mixed together to give you a satin finish if this is the desired look you require, this can be done by mixing them 50/50. Using the sandpaper in the kit you would sand lightly between coats to make the leather clear coat lacquer as smooth as possible, producing that silky smooth leather finish.
Job Done!
What's Included
Small Kit Contents ( this is enough to cover 2 seat facings or a single large chair fully)
1x 250ml Base Color
3x 30ml Tints Each (sometimes more depending on base color)
1x 100ml Gloss Finish
1x 100ml Matt Finish
1x 250ml Leather Prep
2x Large Application Sponges
1x 1200 Sandpaper (1/4 Sheet)
1x 3000 Sandpaper (1/8 Sheet)
1x Emery Pad (1/2 Sheet)
1x Rag
1x Pair of Gloves
1x Detailed Instructions
1x Color Card Wheel
Medium Kit Contents ( this is enough to cover 4 seat facings or a two-seat sofa)
1x 500ml Base Color
3x 50ml Tints each (sometimes more depending on base color)
1x 250ml Gloss Finish
1x 250ml Matt Finish
1x 500ml Leather Prep
4x Large Applicator Sponges
1x 1200 Sandpaper (1/2 Sheet)
1x 3000 Sandpaper (1/4 Sheet)
2x Emery Pad
2x Rags
1x Pair of Gloves
1x Detailed Instructions
1x Colored Card Wheel
Large Kit Contents ( this is enough to fully cover a full car interior or a 3-piece suite)
1x 1ltr Base Color
3x 100ml tints each (sometimes more depending on base color)
1x 500ml Gloss Finish
1x 500ml Matt Finish
1x 1ltr Leather Prep
x6 Large Application Sponges
x1 1200 Sandpaper
x1 3000 Sandpaper (1/2 Sheets)
x2 Emery Pad
x2 Rags
x1 Pair of Gloves
x1 Detailed Instructions
x1 Colored Card Wheel
Recommended Products
Recently Wishlisted
Add on optional description to this section
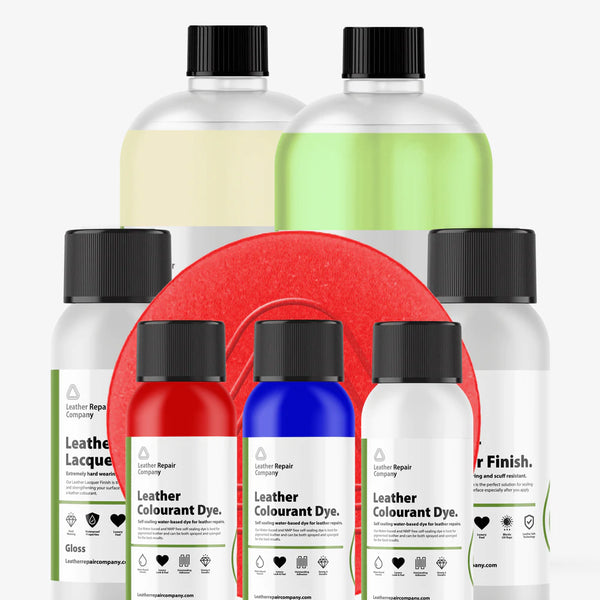
Leather Colorant Dye Repair Kit
$150.00


